Franking mail is a great way to speed up and reduce the cost of regular business mail. If you’re sending first-class large envelopes, you could save up to 40p per locally posted letter. That adds up fast!
Still, franking can look complicated upfront. Luckily, once you get the hang of it, franking mail is simpler than buying online stamps and much faster than taking your post to the post office.
Let’s take a look.
Frank Your Mail
Sort your mail by size, class, and department. If you have an automatic feed with differential weighing, you don’t have to sort by size.
Still, you’ll want to have different boxes for first class and second-class post. You’ll also want to keep international, signed-for, and other special posts separate.
- Sort posts by category, class, and shipping destination. Additionally, sort by weight if you don’t have a differential scale. You’ll get a fine if you frank incorrectly by size, weight, or destination. Then, frank each sorted pile separately.
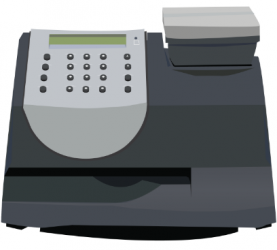
- Frank using your presets by passing mail through the franking machine. Machine instructions vary per machine. In addition, you may have to add credit from the machine or the online terminal before franking.
- Frank directly into marked trays for each class, category, and destination. Use the trays provided by your machine manufacturer or connect with your local post office about what to use. Normally, that’s no more than 80 large business envelopes per tray and no more than 320 standard letters per tray.
- Quality control franked mail as it comes off the franking machine. Check for:
- Visible labels
- Fully printed stamps
- Correct franking
- Sticker your mail as needed. For example, if you are using international air mail, you have to add an AIR MAIL to the top left corner. Alternatively, you could make sure your franking machine prints this on the envelope in the top left corner. Affix any relevant customs declarations such as CN22 or CN23 and fill out the electronic customs data.
Presenting Franked Mail
Once your mail is franked, all you have to do is sort it. That means using either a pouch, tray, or bag depending on the volume of postage. You’ll receive these from your franking machine provider or directly from the post office.
Make sure you sort letters by size and organize post so that addresses are facing the same way and franking marks are in the same corner. Then, bundle the letters together with an elastic band.
Standard pouches can hold as many as 200 standard letters or 45 large letters. Use separate pouches for standard and large letters, unless you have a very low volume of mail.
- Red – First class letters
- Green – Second-class letters
- White – Use these for international mail
- Signed for Delivery and Custom Delivery – These should be presented loose, in a tray, with the addresses facing outward.
If you have any other questions, you can simply ask your carrier at the time of collections.
Collections vs Dropping Off Franked Mail
Royal Mail strongly encourages using collections to ensure your mail is picked up and taken away on time. This limits unexpected sorting for the Royal Mail and offers added convenience for you.
Collection fees are also cheaper than what you’ll usually spend on labour sending someone to the post office, so setting up collections is a smart idea if you post at high volumes.
| Collection Time | Annual Fee |
|---|---|
| Weekday (Time chosen by Royal Mail) | £1,100 |
| Weekday (Time chosen by you) | £2,350 |
| Saturday (Time chosen by Royal Mail) | £325 |
| Saturday (Time chosen by you) | £650 |
| In-Store collection | £1,020 |
If your business spends £20,000 or more with the Royal Mail each year, weekday collections are free. Plus, you’ll pay just £17.92 per additional collection you need.
Keep in mind that you’ll also pay a yearly fee of £295 per floor that your postal carrier has to go up to collect your postage. Set up collections on the ground floor for the lowest rates!
When do collections not make sense? If you’re sending 20 or fewer franked envelopes per day, you can simply use a franked mail postage box. You can also use a standard mailbox, providing you’ve used a red franking envelope.
That’s it! You don’t have to do anything else to prepare your franked mail for postage. Of course, your individual franking machine will have its own instructions and programming to consider. However, you’ll set that up with the manufacturer or your supplier.
Good luck getting started!